Migrate emails manually using Outlook
This article describes how to manually migrate emails using Ms Outlook.
There are 3 stages involved;
i. Configure email as POP3
ii. Export email data (PST/OST)
iii. Import email data
Export and Backup OST/PST from Outlook Email Application
This is the easiest, straightforward and effortless way to export and backup Outlook Emails:
- Firstly, open and log in on MS Outlook.
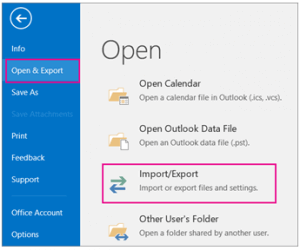
- Then, go to File and click on Open and Export followed by Import/Export
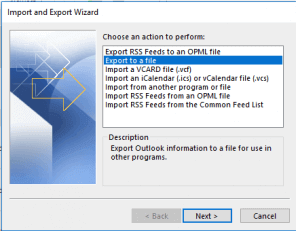
- On Import and Export Wizard, click Export to a File and click Next.

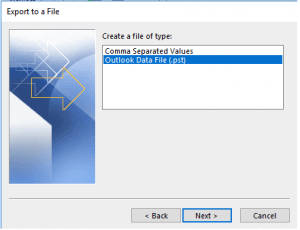
4. After that, select Outlook Data File (.pst). again click Next.

- In case any dialog box appears to save on other location, click on Cancel button.
- Lastly, type a name for Outlook backup. Click Finish.
Import the OST/PST to New Email account
You will need to remove and add the email account again in Outlook using your new hosting’s mailserver as Host:
- Firstly, configure the email using the guide provided.
NOTE: Kindly use new hosting’s mailserver or update the DNS of current mailserver to new server. - At the top of your Outlook ribbon, select File.

3. Select Open & Export > Import/Export. This starts the Import/Export wizard.

- Select Import from another program or file, and then click Next.
- Then, select elect Outlook Data File (.pst) and click Next.
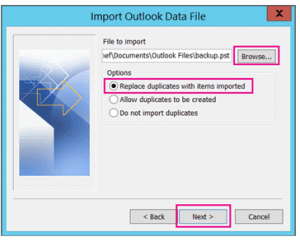
- Browse to the .pst file you want to import. Under Options, choose how you want to deal with emails and contacts, then choose Next.

- If you’re importing the contents of your .pst file into your mailbox, choose that mailbox here.
- And if you’re NOT importing into your mailbox, choose Import items into the current folder. This imports the data into the folder currently selected.
- Choose Finish. Outlook starts importing the contents of your .pst file immediately. When the progress box disappears, the import is finished.


